



💡 The Big Idea
In a previous post, I argued that how we introduce a learning outcome matters just as much as the words themselves. In another, we dug into success criteria. When to share them, how to phrase them, and how to avoid turning them into wallpaper at the beginning of a lesson.
This time, I want to zoom in on something smaller but quietly powerful: How we represent the Learning Outcome and Success Criteria on the board or slide and how that changes depending on the kind of knowledge we’re teaching.
👀 A Closer Look
First of all, let’s quickly recap the types of knowledge we’re dealing with and what that means for learning outcomes and success criteria.
We’ve got:
Declarative / substantive knowledge – the stuff pupils need to know: facts, concepts, vocabulary, principles.
Procedural knowledge – the stuff pupils need to do: methods, routines, strategies, ways of working things out.
Some lessons lean heavily one way or the other. Sometimes you’re teaching a clear procedure (long multiplication, a calculation method, using a map and key). Sometimes you’re building up information or facts pupils need to know by the end (causes of flooding, features of myth texts, parts of a plant). Sometimes, it’s a bit of both. For example, knowing what an adverbial phrase is and using it in writing.
That’s where the closed vs open objectives distinction comes in.
With closed objectives, success is pretty much binary. By the end of the lesson, pupils can either do the thing or they can’t. This lends itself to procedures and certain declarative lessons. The success criteria here should reflect the specific knowledge or steps needed to be successful.
With open objectives, success is more qualitative. There isn’t one “right” answer, but a range of stronger and weaker responses. This is usually where children are demonstrating a combination of both procedural and declarative knowledge. Writing a set of instructions, for example, will involve a range of knowledge components, and different children will be expected to demonstrate these to different depths. Success criteria here looks more like checklists, toolkits or menus that support choice.
Once you see that pattern, it becomes clear that not every lesson needs the same three-bullet-point success criteria sitting under a learning objective. If some lessons are about knowing specific information, others about knowing a process, and others about including and demonstrating a broader set of knowledge components (as in writing or art), then the way we represent the Learning Outcome and Success Criteria should differ.
Which leads to the question at the heart of this post:
How do we make sure the layout of Success Criteria matches the shape of the knowledge structure?
For me, that’s meant settling on three simple formats that cover most lessons:
A Box Grid for closed, chunked success criteria
A Sequence Grid for closed, sequenced success criteria
A Checklist for more open-ended success criteria
Same outcome structure. Different layouts. A better match between what’s on display and what we intend encode into the children’s heads.
👀 Why the Layout Matters
When we share Success Criteria visually, we’re giving pupils a structure that helps organise their thinking. From a cognitive science angle, that structure nudges how children store, connect, and later retrieve what they’re about to learn. It’s the same argument I made in Designing Tasks That Help Children Organise Knowledge. The frames you choose quietly shape the thinking that happens.
If I write four separate facts as a numbered list, I’m implying there’s an order.
If I list the steps of a process as loose bullets, I’m hiding the fact that sequence is everything.
The format sends a message about how the knowledge works, even if we never say it out loud. So instead of one default template, we need a small set of templates that help teachers represent the lesson’s knowledge type more explicitly. So what might these look like? Well, let’s have a look, shall we?
🧊 Chunks of Knowledge: The Box Grid Frame
The first template is the simplest: a Box Grid Frame – usually three or four boxes under Success Criteria. We use it when the knowledge is made up of distinct but related chunks, and pupils need all of them by the end of the lesson.
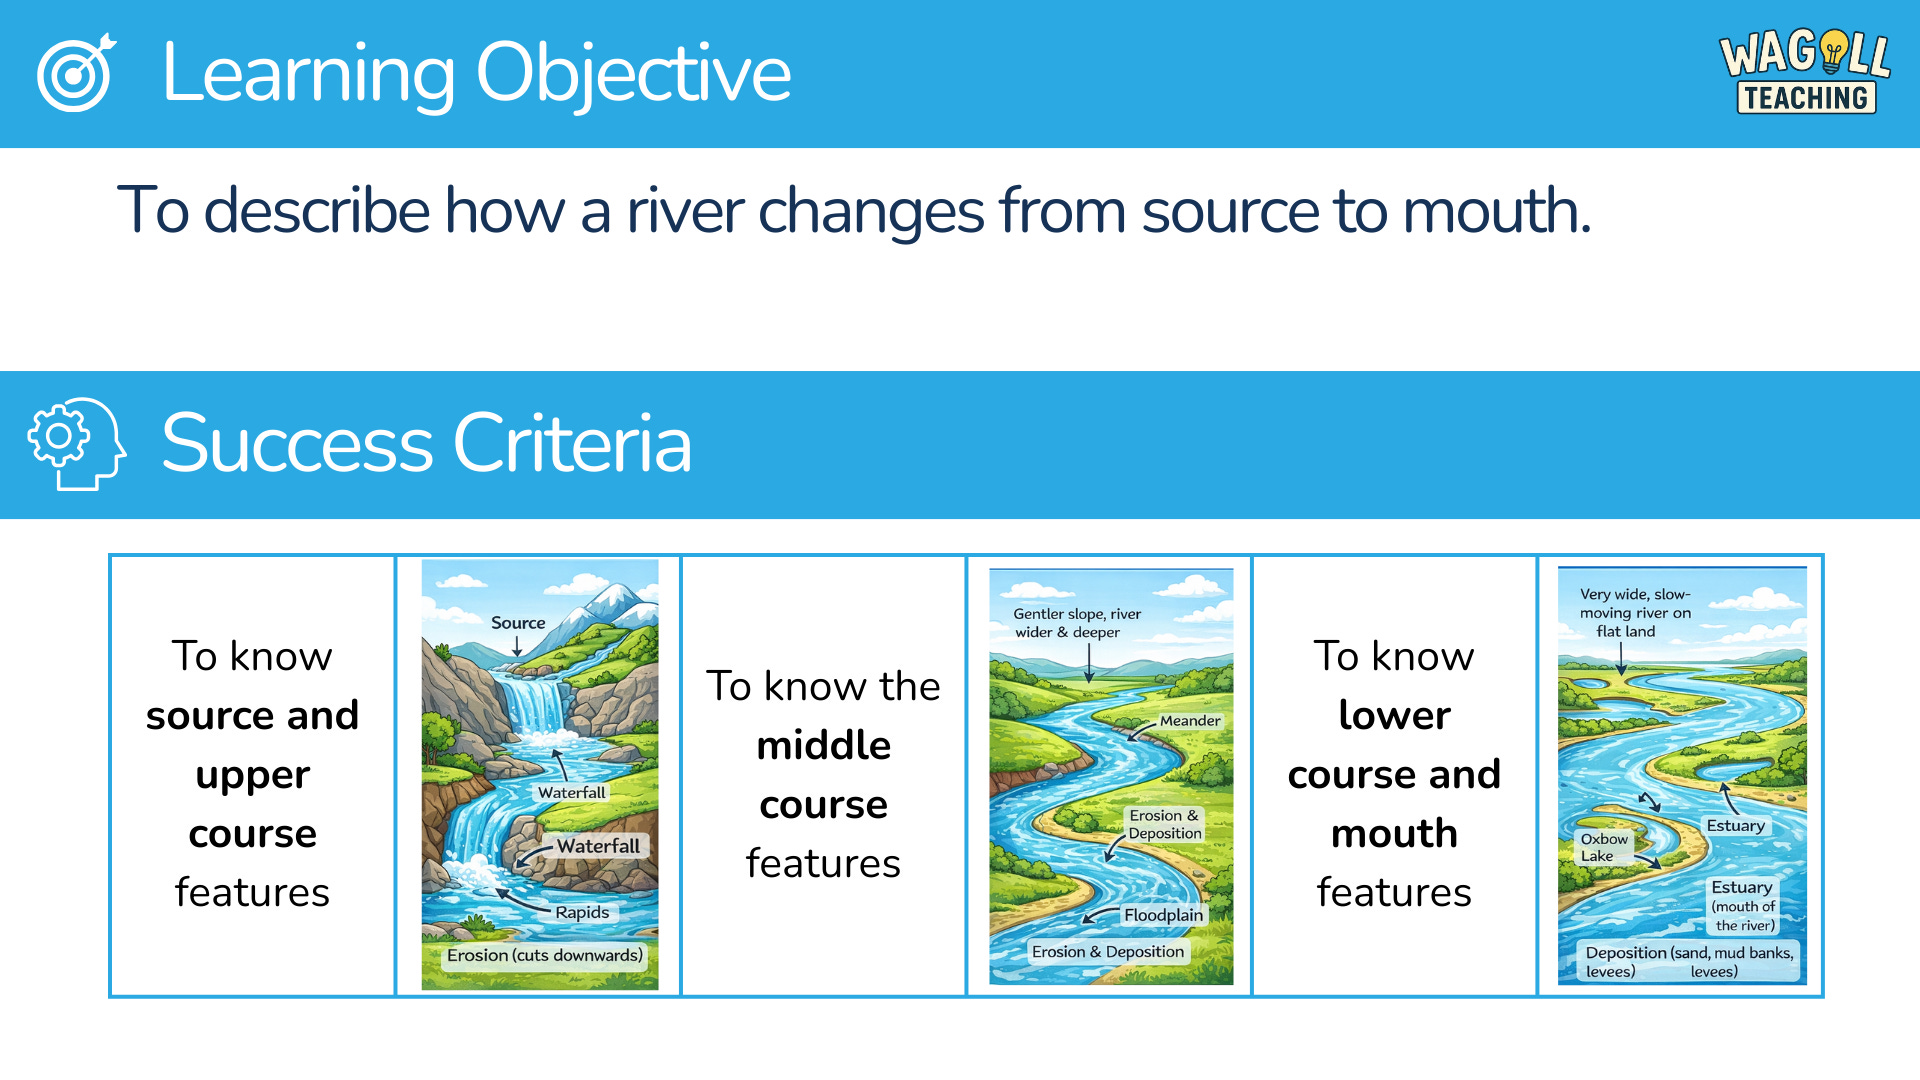
Think of a geography lesson on rivers. The learning outcome might be:
To describe how a river changes from source to mouth.
Under Success Criteria, the boxes might read:
source and upper course features
middle course features
lower course and mouth features
Nothing fancy. But that grid does three useful things.
First, it signals that the knowledge is a set, not a sequence. These are three aspects of the same idea, not three steps to follow.
Second, it forces us to be selective. If you can’t fit the key knowledge into three, four or, at a stretch, five boxes, it might be a sign that the outcome is too big for one lesson.
Third, it gives pupils a visual model of what success will look like. By the end, they should be able to say something about each box and they can see which bits they feel confident with and which might need revisiting tomorrow.
Later in the unit, that same Box Grid might also reappear as a retrieval structure. This time, the boxes are empty or half complete, and the pupils fill them from memory. The success criteria has quietly turned into a task.
🔁 Sequences and Processes: Sequence Grid Frame
The second template looks almost identical – boxes in a row – but with one addition: arrows. This is the Sequence Grid Frame.
This is for lessons where a sequence or process matters. The knowledge is still chunked, but each chunk leads to the next. Swap them round, and you change the meaning.
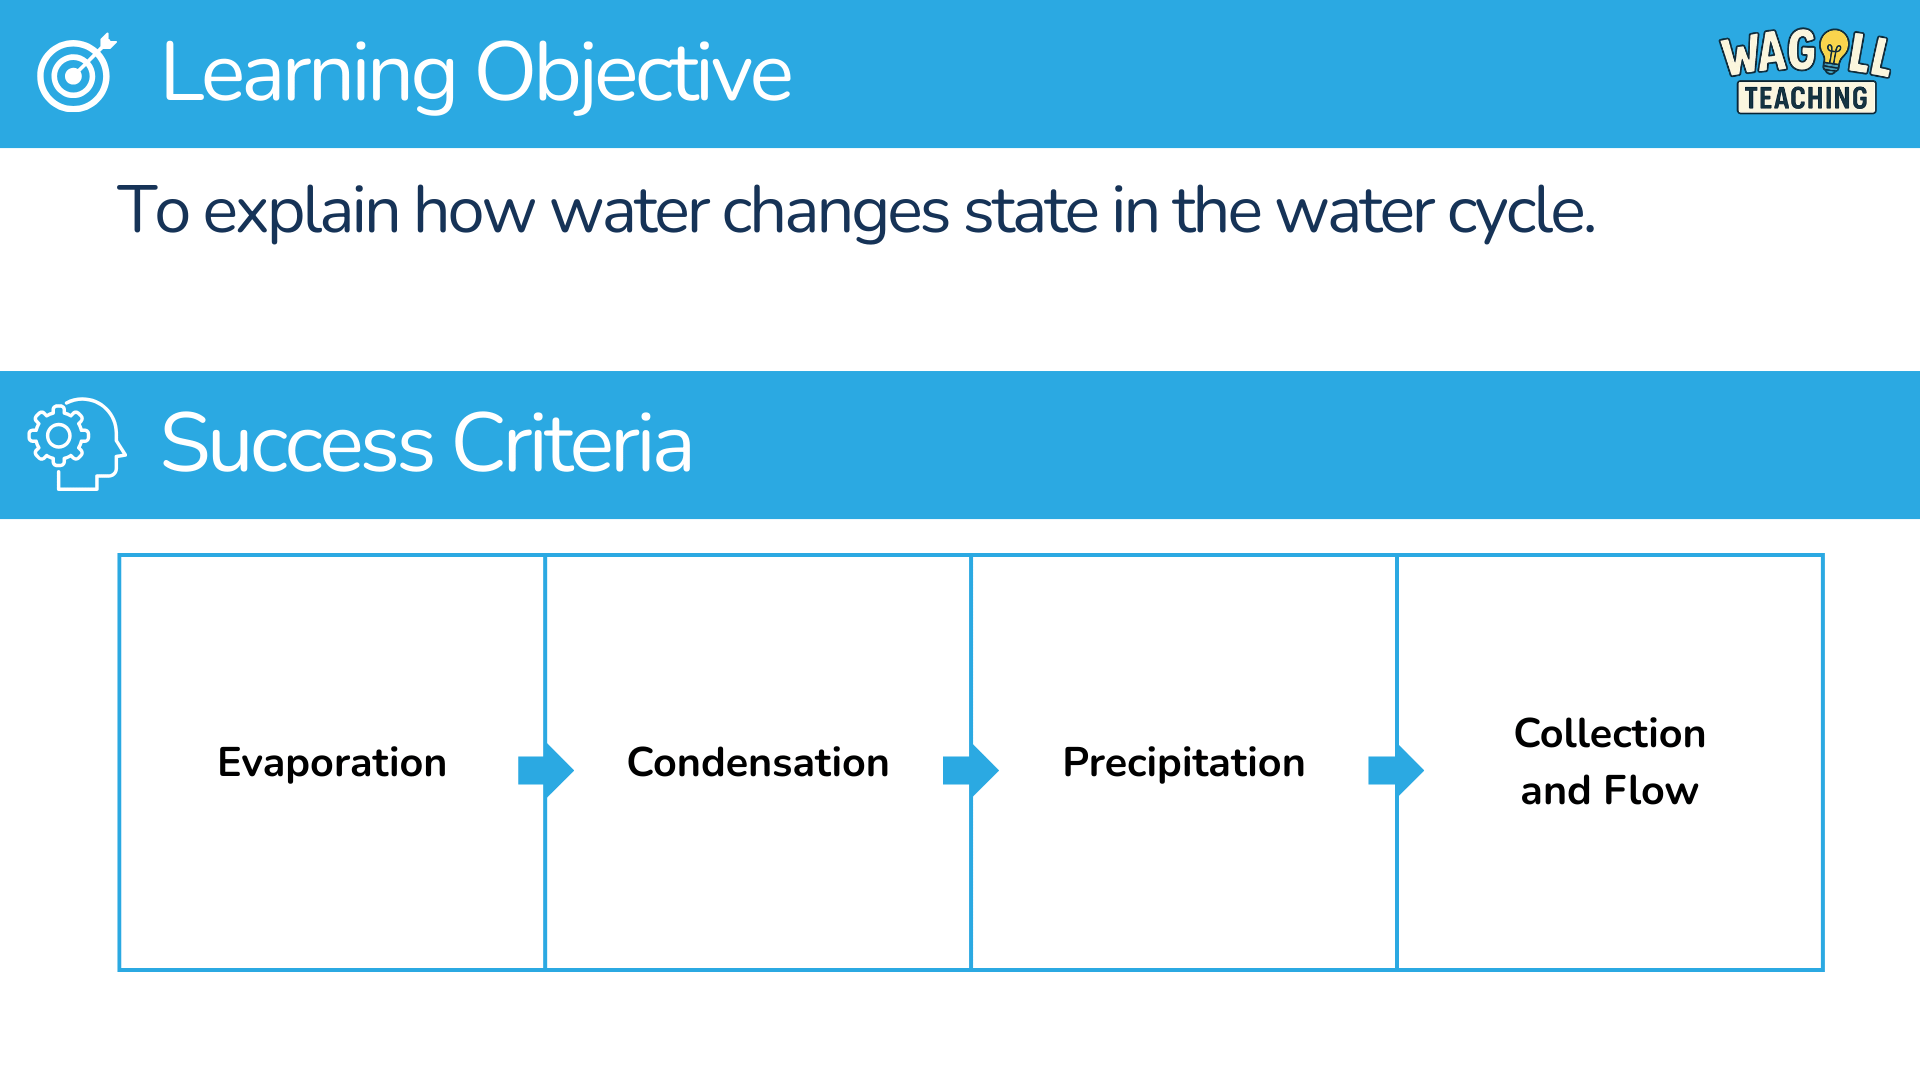
Take a science lesson on changing state. The outcome might be:
To explain how water changes state in the water cycle.
The Success Criteria boxes, joined by arrows, could be:
evaporation →
condensation →
precipitation →
collection and flow
Here, the arrows show this isn’t just four facts to remember; it’s a process that moves in a particular direction and order. They hint that later pupils may need to reconstruct it from memory, predict what comes next, or explain why a missing step breaks the system.
Again, the template can become a task. You can:
give them jumbled steps to reorder
leave one box blank for them to complete
ask them to sketch a quick doodle for each stage
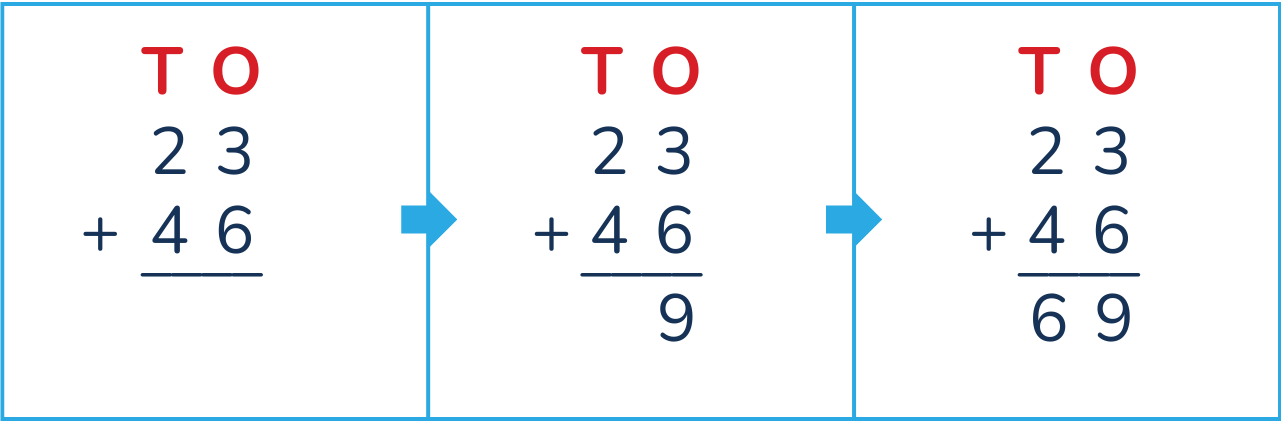
A quick note on transient processes
One of the big issues with teaching processes is the transience of information. As Oliver Caviglioli often points out, spoken explanations disappear as soon as they have been said. By making a process visible, it becomes more concrete. However, when modelling, once a method (like column addition) is finished, all you can really see is the final answer, not the steps that have taken place in the build up. A sequencing frame removes this transience. By making each step visible and keeping all of them on show at once, step 1 doesn’t disappear when you move to step 2 and 3. Pupils can see the full process. They can see the different steps of knowledge needed to be successful.
✅ Checklist Criteria: The Checklist Frame
The third template swaps boxes for simple tick boxes. This is the Checklist Frame. It comes out when the lesson is focused on including or demonstrating knowledge that is assessed more subjectively. These are things pupils need to include in their writing, spot in a text, or check for in a practical task like throwing a ball in PE.
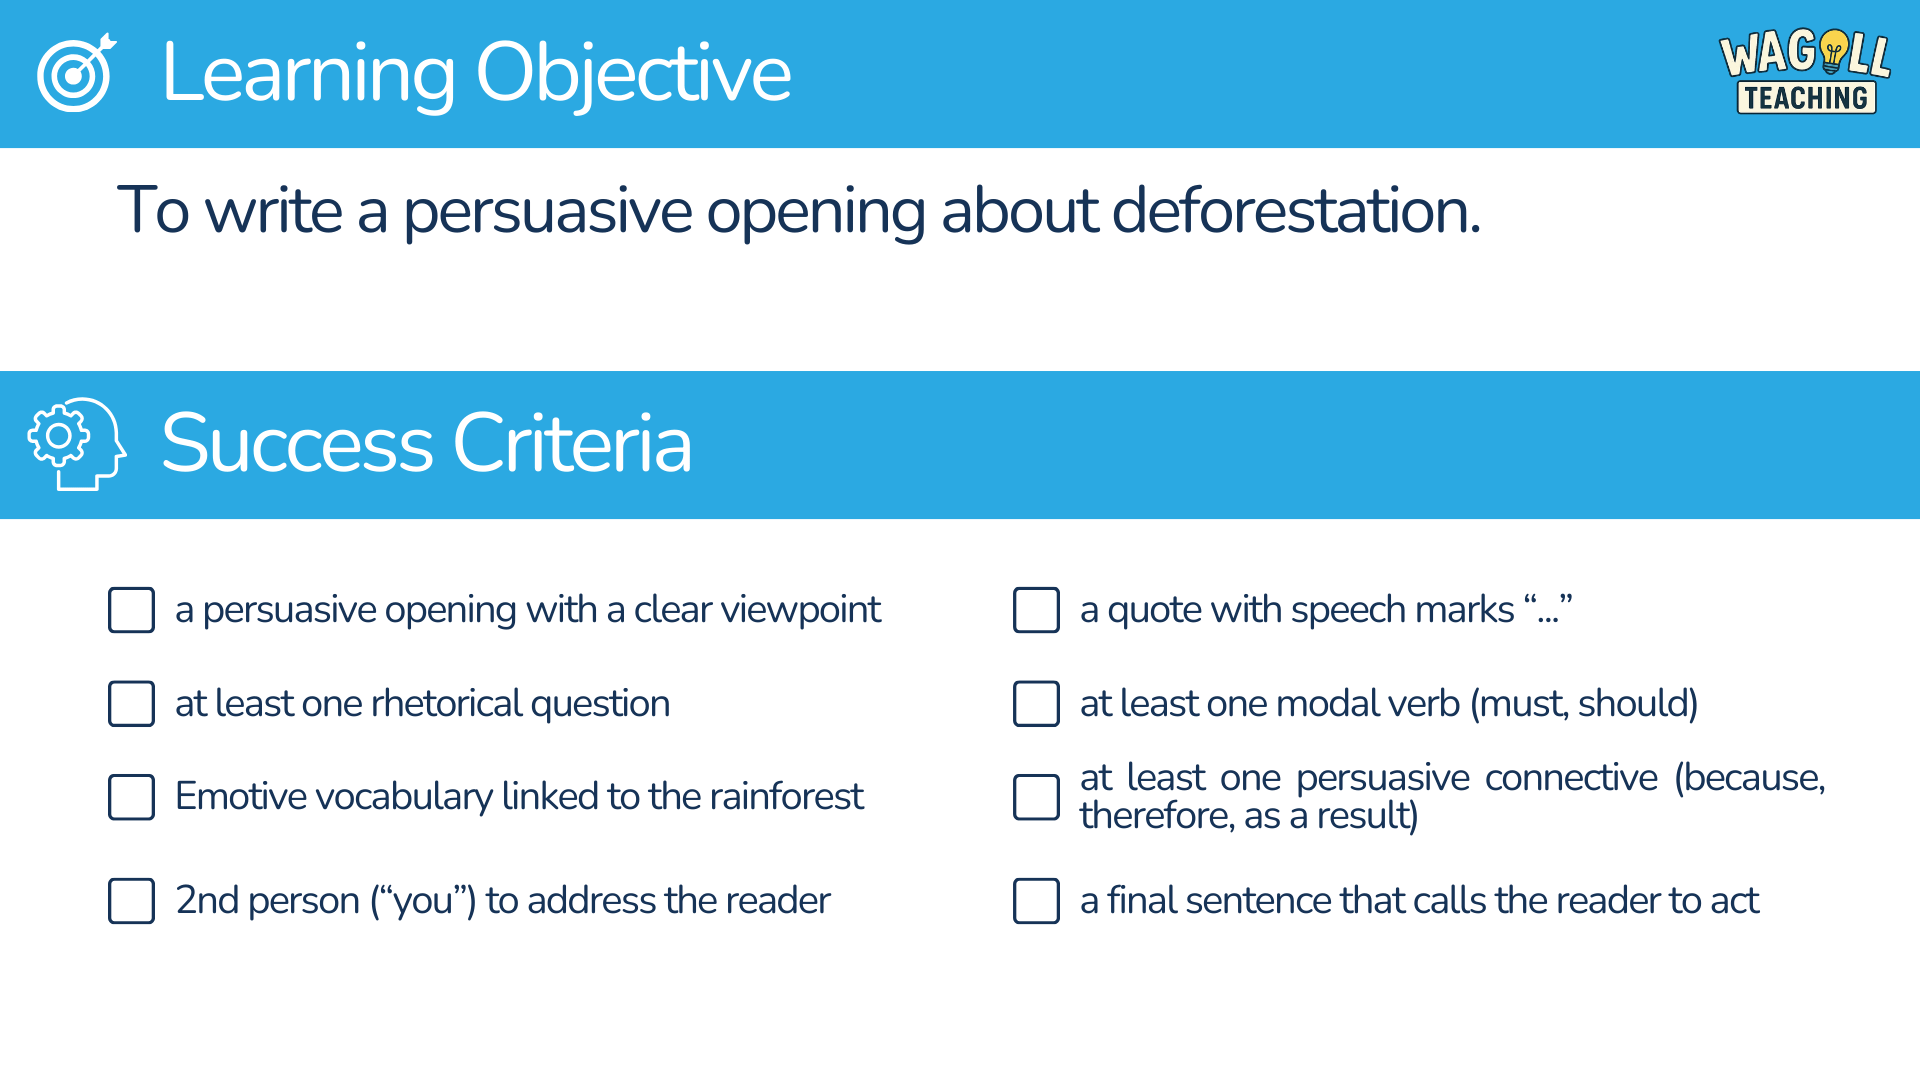
Imagine a Year 5 writing lesson:
To write a persuasive opening about deforestation.
Under Success Criteria, instead of four floating statements, you’ve got a neat checklist:
a persuasive opening with a clear viewpoint
at least one rhetorical question
emotive vocabulary linked to the rainforest
2nd person (“you”) to address the reader
a quote with speech marks
a model verb
at least one persuasive connective (because, therefore, as a result)
a final sentence that calls the reader to act
Each statement sits next to a small empty box that pupils can check against. As you model a paragraph or share an example under the visualiser, you can tick them live:
“We’ve got our viewpoint. Tick. We’ve used a rhetorical question. Tick. Have we used enough emotive language yet? Maybe not – let’s tweak that sentence…”
By the time pupils move into independent writing, the Checklist has turned into a tool they can pick up and use. It works just as well at the end, too, when they reread and tick what they’ve managed to include.
🧠 Helping Children Notice the Shape of Knowledge
What I like about these three templates – the Box Grid, the Sequence Grid, and the Checklist – is that they quickly become familiar.
Teachers become more confident with understanding the knowledge types, and students become more familiar with what to do with them. They see four boxes with arrows and think, ‘Ah, a process.’ They see a Box Grid and think and see the chunks of knowledge required. They see tick boxes and think, ‘These are the things I need to include or check for today.’ There is a metacognitive element to it, too.
They’re learning to recognise the shape of different kinds of knowledge. That’s schema work again. And it links straight back to the wider idea I keep coming back to: we don’t just fill children’s heads with information; we help them organise that knowledge so they can do something useful with it. And the success criteria is perhaps a good place to start.
🎯 The Bits That Stick
✅ The way we lay out Success Criteria and information can shape how pupils understand and remember it.
✅ Use a Box Grid when the lesson is about connected chunks of knowledge; use a Sequence Grid when it’s a process; use a Checklist when pupils need to include or spot features.
✅ Recycle the same layouts as task frames
✅ Simple patterns help children recognise how knowledge is structured.
In a bit,
Coops 😎